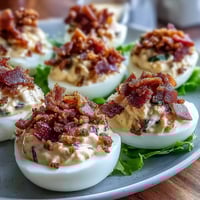
Pin it
 There's this moment at every dinner party where someone reaches for the cheese board, and I thought, what if we took that same energy but made it into something you could actually eat with your hands without the guilt? That's how charcuterie chips happened—a late afternoon when I was tired of the usual crudités and realized the best flavors were already cured and waiting. The first batch came out crackling and golden, and suddenly everyone was gathered around like I'd invented something revolutionary. It wasn't complicated, just meat and cheese doing what they do best when heat gets involved.
I made these for a wine tasting with friends who were all trying new diets, and watching their faces when they realized these were basically just meat and cheese—no weird ingredients, no apologies—was worth every bit of flour-free kitchen evolution. One friend grabbed three at once and said they tasted like someone finally figured out what appetizers should be. That's when I knew this wasn't just a recipe, it was permission to make snacking feel fancy and still feel good.
Ingredients
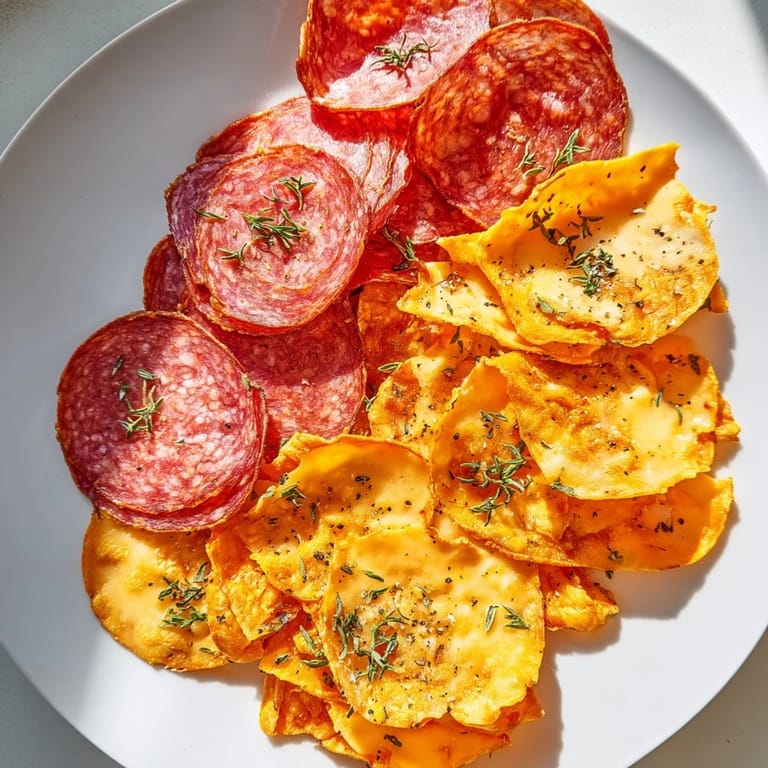
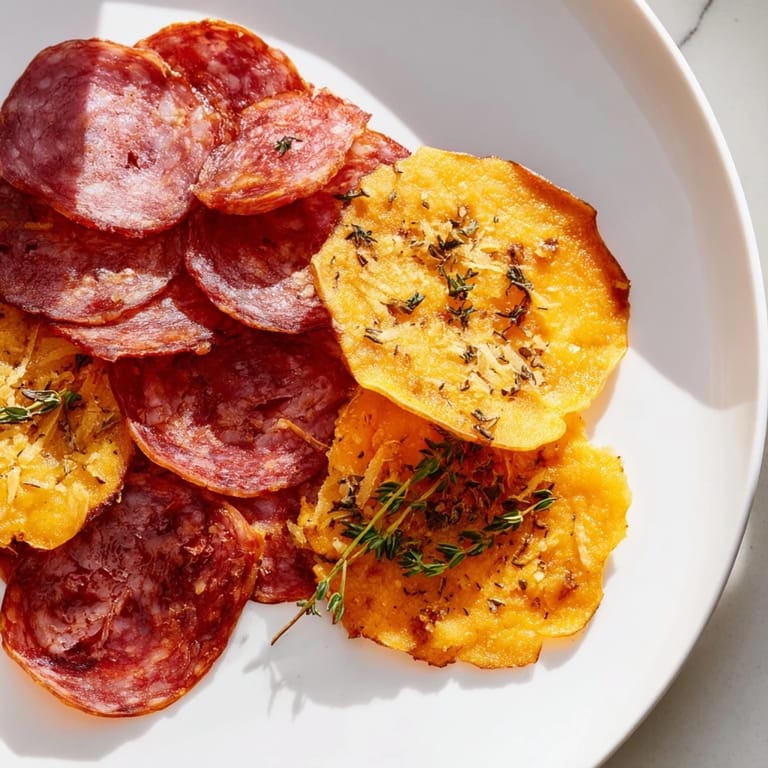
- Salami, sliced thin: The flavor workhorse—it gets crispy at the edges and creates little cups of rendered fat that make everything taste incredible.
- Prosciutto, sliced thin: Delicate and salty, it almost melts if you catch it at the right moment, so watch the timing closely.
- Pepperoni, sliced thin: The spicy anchor that keeps things interesting and adds color to your platter.
- Aged hard cheese: Cheddar, Manchego, or Parmesan get brittle and shatter beautifully when baked, creating that irresistible crunch.
- Semi-hard cheese: Gouda or provolone bubble up and create these caramelized edges that taste like umami concentrated into a single bite.
- Fresh herbs: Thyme or rosemary scattered on top become intensified and crispy, adding a whisper of sophistication.
- Cracked black pepper: A small gesture that somehow makes everything taste more intentional.
Tired of Takeout? 🥡
Get 10 meals you can make faster than delivery arrives. Seriously.
One email. No spam. Unsubscribe anytime.
Instructions
- Get your oven ready and prep the pans:
- Heat to 375°F and line two baking sheets with parchment—the parchment is non-negotiable because it's what lets your chips lift off cleanly and stay crispy underneath. Use two sheets because meat and cheese need different timing and deserve their own space.
- Arrange the meats:
- Lay each slice flat without overlapping, like roof shingles that are slightly offset. They'll shrink and curl at the edges, which is exactly what you want.
- Arrange the cheese:
- Space these slices with a little breathing room between them because they're going to bubble and spread, and touching pieces will fuse together into a cheese puddle instead of individual crispy chips.
- Optional flavor boost:
- If you're feeling it, sprinkle herbs or pepper over the cheese now—they'll toast right into the surface.
- Bake the meats first:
- Eight to ten minutes until the edges brown and crisp up, then remove and let them cool completely on the pan. They'll continue crisping as they cool, becoming brittle and perfect.
- Bake the cheese:
- Six to eight minutes until golden and bubbling slightly at the edges. Let it cool for five minutes while it firms up, then gently lift with a thin spatula before it sticks permanently.
- Serve while they're still crackling:
- Arrange everything on a platter and eat immediately—they're best in that window before they start absorbing humidity from the air.
 Pin it
 The moment that made this recipe stick around in my regular rotation was when my neighbor came over unexpectedly, I had twelve minutes, and I made a platter that genuinely impressed her. She asked if I'd ordered it from somewhere fancy, and that's when I understood the alchemy of the whole thing—sometimes the simplest combinations are the ones that feel the most intentional.
The Science of Crisping
What's actually happening in the oven is water evaporating and fat rendering, which is why these get so impossibly crispy instead of just warm. Cheese browns through the Maillard reaction, and meat dries out in a way that concentrates all its flavors instead of diluting them. This is texture alchemy at its simplest—heat, time, and the right ingredients doing exactly what you need them to do.
Building Your Perfect Charcuterie Chip Platter
The real magic happens after they cool, when you're arranging them on something beautiful and realizing you've essentially created edible gold. Mix the textures and colors so every reach feels different—the deep red of pepperoni next to pale prosciutto, the golden aged cheddar beside the darker Gouda. Add some olives or pickles to the gaps, pour something you actually want to drink, and suddenly you're not just snacking, you're hosting a moment.
Flavor Combinations to Play With
Once you understand how these core ingredients work together, you can start experimenting with smoked meats, Spanish chorizo, or even thin slices of good mortadella. Add smoked paprika to the cheese mix, try fresh thyme versus dried (fresh intensifies, dried spreads wider), or layer flavors by sprinkling everything before baking. The skeleton of the recipe stays the same, but the details are where your personal touch comes through.
- Smoked paprika, garlic powder, or a tiny pinch of cayenne scattered over cheese before baking creates hidden flavor depth.
- Try pairing different meats with different cheeses—pepperoni with sharp cheddar, prosciutto with Manchego—and notice how each combination tells a different story.
- Fresh cracked pepper tastes noticeably better than pre-ground, and it's the kind of small effort that actually changes what you're eating.
 Pin it
 These chips are proof that the best appetizers are the ones that look intentional but feel effortless, the ones where your guests feel genuinely seen because you made something that tastes like actual thought instead of a shortcut. They're the kind of small thing that becomes a regular part of your cooking rotation the moment someone asks you to make them twice.
Recipe FAQ
- → What meats work best for charcuterie chips?
Thinly sliced cured meats such as salami, prosciutto, and pepperoni are ideal due to their texture and fat content, which crisp well when baked.
- → How can I prevent cheese slices from sticking during baking?
Arrange cheese slices spaced apart on parchment-lined baking sheets and bake at moderate temperature to avoid melting into each other.
- → Can I add flavor variations to these chips?
Yes, sprinkling fresh herbs like thyme or rosemary, cracked pepper, or smoked paprika before baking enhances their savory profile.
- → How should I store leftover chips?
Store in an airtight container at room temperature for up to two days to maintain crispness and flavor.
- → Are these chips suitable for low-carb diets?
Yes, these chips are low in carbohydrates and rich in protein and fat, making them a suitable low-carb snack option.