 Pin it
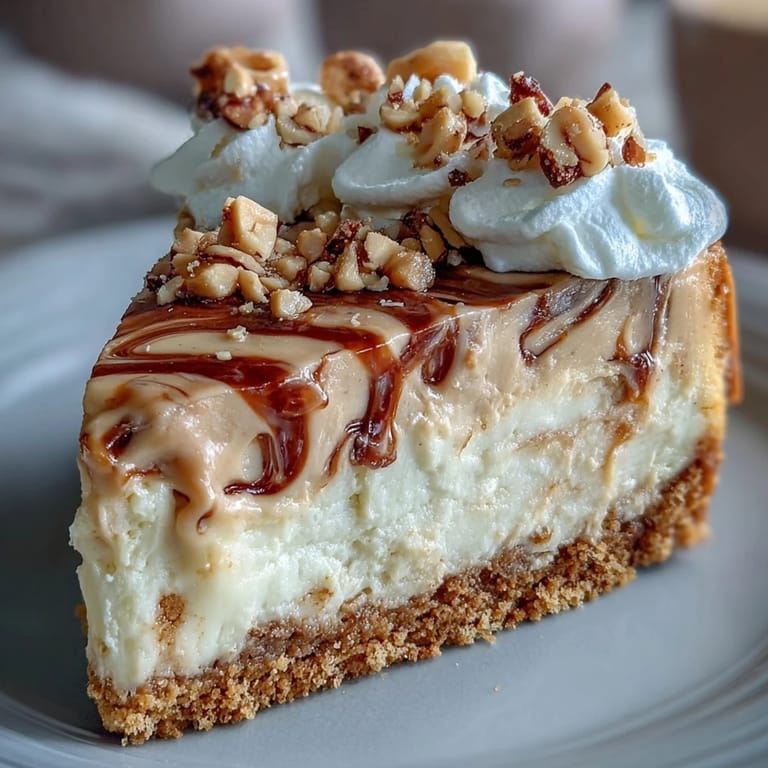
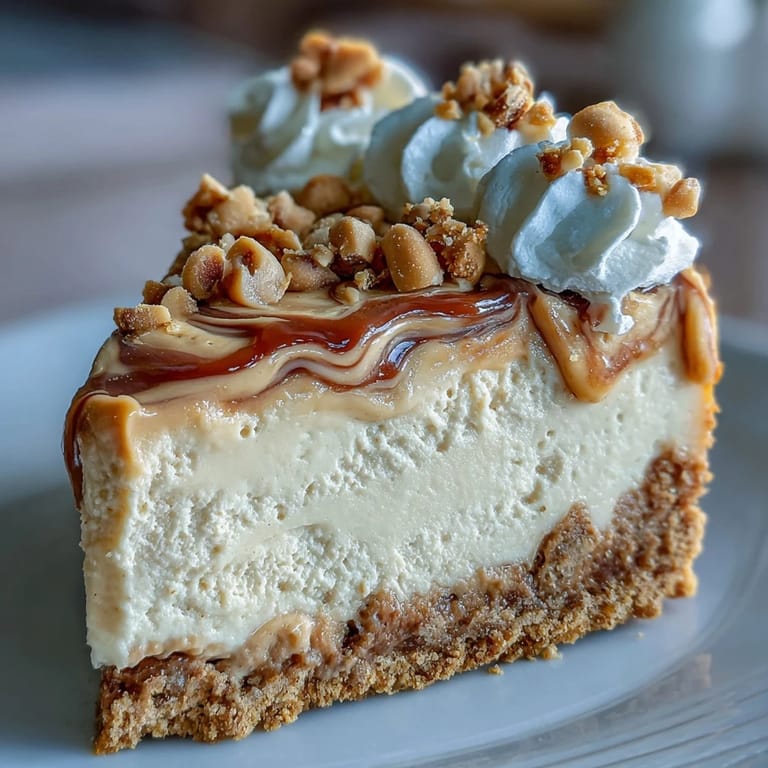
 My neighbor knocked on my door holding an empty plate and asked if I had anything sweet. I had cream cheese, a sleeve of Nutter Butters my nephew left behind, and just enough peanut butter in the jar to matter. What started as improvisation turned into the cheesecake I now bake every time someone needs cheering up. The crust alone smells like childhood lunchboxes, and the filling sets into something so silky you forget you're eating dessert made from cookies.
I brought this to a potluck once and watched three people go back for seconds before the main course was served. One friend admitted she ate a slice in her car on the way home because she couldn't wait. The combination of salty peanut butter and sweet cream cheese hits a spot that regular cheesecake just misses. It's become the dessert I'm asked to bring by name, not just by category.
Ingredients
- Nutter Butter cookies: These become the crust and bring a salty-sweet peanut butter punch that graham crackers can't match, crush them fine but leave a few small chunks for texture.
- Unsalted butter: Binds the cookie crumbs into a crust that holds its shape and doesn't crumble when you slice, melted and still warm works best.
- Cream cheese: The foundation of the filling, it must be fully softened or you'll end up with lumps no amount of mixing will fix.
- Granulated sugar: Sweetens the tangy cream cheese without making the cheesecake cloying, and helps the filling set smooth.
- Vanilla extract: A teaspoon is all you need to round out the peanut butter and keep the flavor from feeling one note.
- Eggs: They give the cheesecake structure and that classic dense creamy texture, add them slowly and don't overbeat.
- Creamy peanut butter: Use the regular stuff, not natural, because it blends smoothly and doesn't separate or make the filling oily.
- Heavy whipping cream: Whip it fresh right before serving so it stays fluffy and cloud like on top of each slice.
- Powdered sugar: Sweetens the whipped cream and stabilizes it just enough to hold its shape for a few hours.
- Chopped peanuts: Optional but worth it for the crunch and visual contrast against all that creaminess.
Tired of Takeout? 🥡
Get 10 meals you can make faster than delivery arrives. Seriously.
One email. No spam. Unsubscribe anytime.
Instructions
- Prep the pan:
- Preheat your oven to 325°F and grease a 9 inch springform pan, then line the bottom with parchment paper so the crust releases cleanly. This step saves you from scraping later.
- Build the crust:
- Crush the Nutter Butters into fine crumbs, mix with melted butter until it looks like wet sand, then press firmly into the pan bottom. Bake for 10 minutes until it smells toasty and let it cool completely.
- Beat the base:
- Whip softened cream cheese and sugar together until completely smooth and fluffy, about 2 to 3 minutes. Scrape the bowl down twice so no lumps hide at the bottom.
- Add the peanut butter:
- Mix in vanilla and peanut butter until the color is even and the filling tastes rich and nutty. Don't rush this, let the mixer do the work.
- Fold in the eggs:
- Add eggs one at a time on low speed, mixing just until each one disappears into the batter. Overbeating now means cracks later, so stop as soon as it's combined.
- Fill and smooth:
- Pour the batter over the cooled crust and smooth the top with a spatula, tapping the pan gently on the counter to release air bubbles. The surface should look glossy and even.
- Bake low and slow:
- Bake for 50 to 60 minutes until the edges are set but the center still jiggles slightly when you nudge the pan. It will firm up as it cools, trust the jiggle.
- Cool in the oven:
- Turn off the heat, crack the oven door, and let the cheesecake sit inside for an hour. This gradual cooldown prevents the top from splitting down the middle.
- Chill completely:
- Refrigerate for at least 4 hours or overnight so the filling sets firm and the flavors deepen. Patience here makes all the difference in texture.
- Whip the topping:
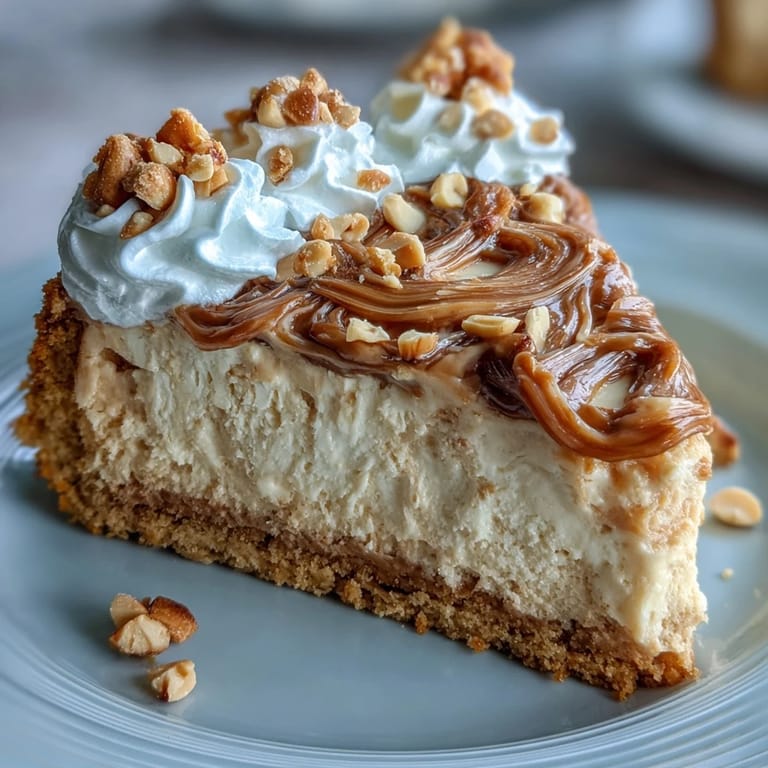
- Beat cold heavy cream with powdered sugar until stiff peaks form, then spread it over the chilled cheesecake right before serving. Fresh whipped cream tastes a thousand times better than the canned stuff.
- Garnish and slice:
- Sprinkle chopped peanuts and tuck a few whole Nutter Butters on top for decoration. Run a hot knife under water before each cut for clean slices.
 Pin it
 The first time I served this, my friend who claims she doesn't like peanut butter ate two slices and asked for the recipe before she left. She texted me a photo of her own version a week later with the caption I can't stop making this. That's when I knew it wasn't just a dessert, it was the kind of recipe that gets passed around and remade until everyone has their own story about it.
Make Ahead Magic
This cheesecake actually improves after a night in the fridge because the flavors marry and the texture becomes impossibly creamy. I always bake it the day before I need it, then add the whipped cream and garnish right before serving. You can even freeze it without the topping for up to a month, just thaw it overnight in the fridge and no one will know the difference.
Serving Suggestions
A drizzle of warm chocolate or salted caramel sauce turns this into something bakery fancy without any extra effort. I've also served it with a handful of fresh raspberries on the side to cut through the richness, and the tartness plays beautifully against the peanut butter. Some people like it plain, some want all the toppings, either way it disappears fast.
Storage and Leftovers
Keep any leftover slices covered in the fridge for up to five days, though in my house it rarely lasts that long. The whipped cream might deflate a little after a day, but the cheesecake itself stays perfect. If you're storing it with the topping already on, use a cake dome or loosely tent it with foil so the cream doesn't get squished.
- Let the cheesecake come to room temperature for 10 minutes before slicing so it's easier to cut.
- Wipe your knife clean between slices for picture perfect edges every time.
- If you don't have a springform pan, a regular cake pan works but you'll need to serve it straight from the pan.
 Pin it
 This cheesecake has become my answer to every celebration and every bad day that needs sweetness. It's rich enough to feel special but familiar enough that no one feels intimidated by a slice, just happy to eat it.
Recipe FAQ
- → Can I make this cheesecake ahead of time?
Absolutely! This cheesecake actually tastes better when made a day ahead. The flavors have time to deepen, and the texture becomes even creamier after chilling overnight in the refrigerator. Just add the whipped topping before serving.
- → Why did my cheesecake crack?
Cracking usually occurs from over-mixing the batter or cooling too quickly. Mix eggs just until combined, and let the cheesecake cool gradually in the oven with the door cracked. Using a water bath also helps prevent cracks by providing gentle, even heat.
- → Can I use natural peanut butter?
Natural peanut butter can work, but it may affect the texture slightly since it tends to separate. Creamy commercial peanut butter with stabilizers gives the smoothest results. If using natural, make sure to stir it thoroughly and consider reducing other liquids slightly.
- → How should I store leftovers?
Store any leftover cheesecake in the refrigerator, covered loosely with foil or in an airtight container. It will keep well for up to 5 days. For longer storage, wrap individual slices tightly and freeze for up to 3 months.
- → Can I substitute the Nutter Butter cookies?
While Nutter Butters provide the classic peanut butter flavor, you could use vanilla wafers, graham crackers, or even chocolate sandwich cookies. However, the flavor profile will change. For the same peanut butter boost, try adding crushed peanut butter cups to the crust.
- → Do I really need a springform pan?
A springform pan is highly recommended because it allows you to remove the sides without damaging the delicate crust. If you don't have one, you can use a regular cake pan lined with parchment paper that extends up the sides, creating handles to lift the cheesecake out.